Showing posts with label Chrome Extensions. Show all posts

Wednesday, July 3, 2013

Making The Most Out Of Google Docs Thru Chrome


Enhancing Your Internet Experience


For years I have been a devoted user of Microsoft Office because, well, it’s what everyone used. I eventually heard of OpenOffice and eventually LibreOffice, but, I just couldn't get use to a new office suite especially considering so few used it. But I then gave Google Docs a try and considering back then it was still behind on Microsoft Office it had one potential, I could access the files from anywhere I had an Internet connection, and even better, I could open Office files on it as well.


Once Google merged Docs with Drive it made the transition easier but still I had to have a copy of Office around because of the average Office user. Lately however I have found some great uses for Google Docs and it involves reviving my Blogger blog and posting to Google+. I have learned that making great content on Google+ requires time, planning and a well written post, the same applies to my blog and so I have been using Google Docs to create posts for both but it was a bit of work maintaining them organized so I did some research and found some extensions that proved to be perfect for what I was trying to accomplish, easy management of my articles and posts before sharing them. Here are the extensions I found:


One thing I found a bit annoying about Google Docs, and somewhat similar with Office, was having to open Drive first before I could start a Doc. This extension allows me to quickly open a new Doc of my choice, Document, Presentation, Spreadsheet and Drawing, all from the extension icon. It was a piece of cake now to get a Doc open when inspiration would hit.  


Of course opening a Doc was easy now but I needed a template that I could use over and over so that my blog articles and Google+ looked more professional. The problem was that whenever I used an existing Doc it would overwrite the current post draft and I either had to create a copy of the file or copy the parts that were default on each post or article. I always look for easier ways to do things and found that this extension did exactly what I needed. I created 2 Docs that were templates for my blog articles and Google+ post and added “MyTemplates” (without quotes) to the title of the files. The extension then searches your drive for any files with this phrase and displays them on a list giving you the option to create a duplicate copy of the file that you can then use without altering the original template. Now I can create articles for my blog or posts for Google+ with templates that never get erased.


Now that I have the ability to create Docs in an instant or pick templates for my blog and Google+ posts now I need an easier way to access the current files in my Google Drive without having to open a new tab and open Google Drive and search. That where this extension comes in, from the extension icon you get a drop-down of all your files in the order in which they were last modified. It even has a search box to make it easier to find a specific file thus making it easier to find my newest blog and Google+ drafts and edit them to share.


All three extensions do a great job at helping me manage my Google Docs so that I can focus on my work without the hassle of creating and searching for files in the clutter that can sometimes happen in your drive.

♢♢♢♢♢♢♢♢♢♢♢♢♢♢♢♢♢♢♢♢♢♢♢♢♢♢♢♢♢♢♢♢♢♢

Thanks for reading. Please feel free to leave a comment below about your thoughts on this. +1 it if you liked it. Share it if you’re inclined. Much appreciated.  :+D

Chatterbox Chuck

Enhanced by Zemanta

Tuesday, June 25, 2013

When Your Bookmarks Get Out Of Control, Its Time To Call In The Bookmark Sentry To Bring Order To Chaos


Enhancing Your Internet Experience

If you’re like me you likely have a huge collection of bookmarked websites that you try your best to keep neatly organized but sometimes its gets hard to keep track of what sites you already have bookmarked and which ones still work. To make matters worse while Chrome is an excellent browser with the ability to sync your bookmarks to across all your Chrome browsers with the same login, more often then not I have noticed that Chrome can duplicate your bookmarks making your organized collection bigger and more cluttered thus hampering your ability to find what you are looking for. But fear not my friends I have an extension that can help you fight back against duplicate and broken bookmarks to bring order back to chaos, a la Borg style.

Bookmark Sentry http://goo.gl/8rR5E

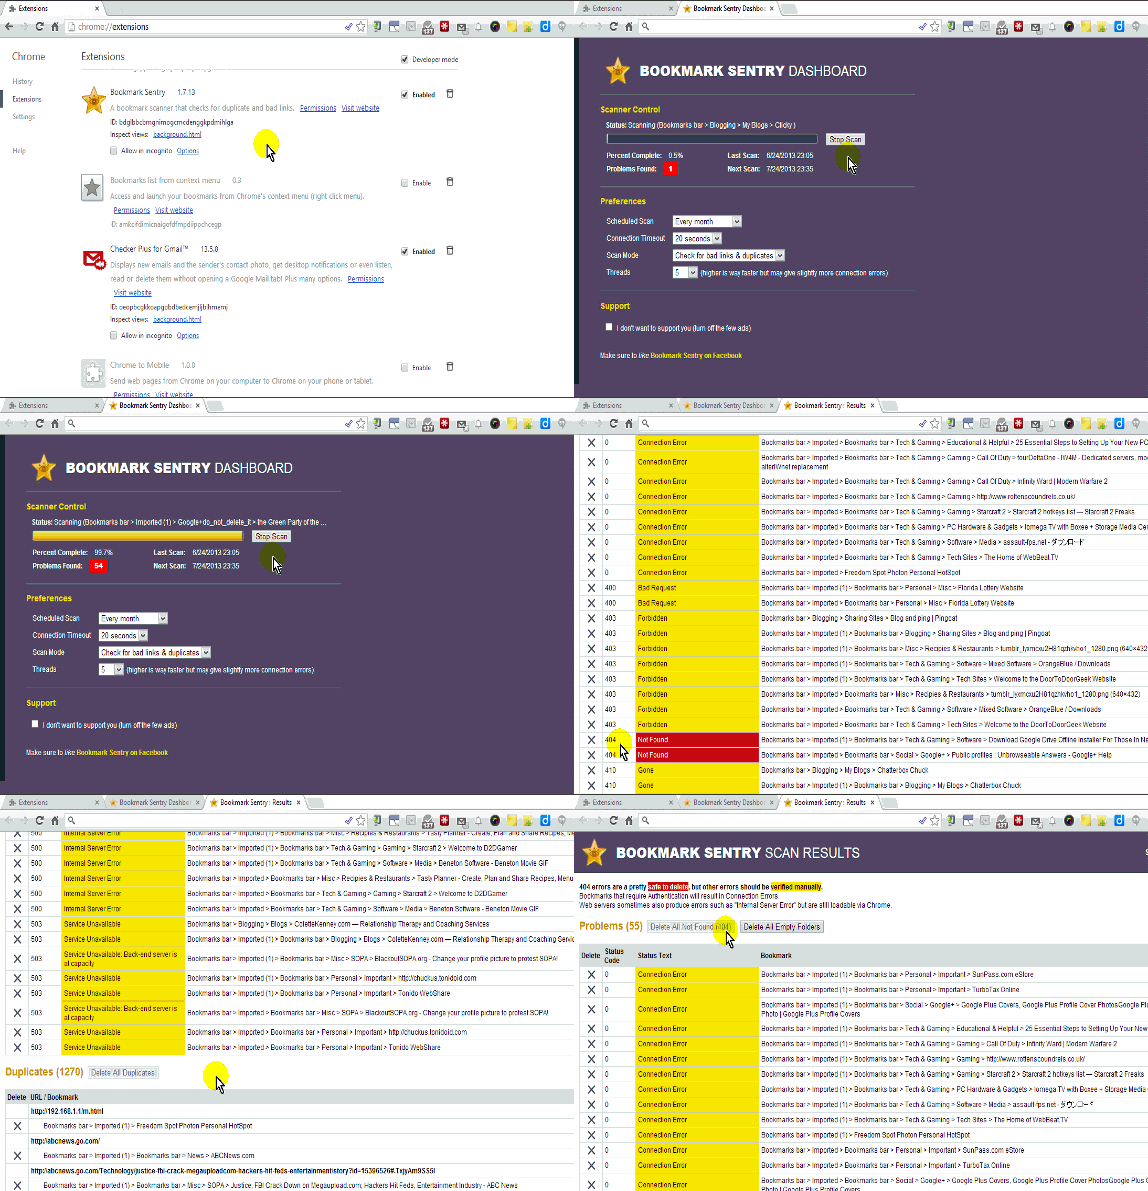
This extension will will go thru your entire bookmark collection on Chrome to search for duplicate links, “not found” bad links (404 errors) and even links that may have issues that you may want to update. Just go to the settings page on Chrome and then to extensions section and click the options link under the Bookmark Sentry extension to run it. The UI gives you an “anti-virus” like scan and starts counting the number of errors as it finds them. Bare in mind not every error it finds is actually an error. You have to take into account that a site may be down or unreachable at the time of the search and you also have to be sure you are on an open network when doing this scan because if the network has restrictions such as blocked sites and filters some of the results can come up as connection errors or blocked so take that into account before considering deleting the link.

After the scan is done a tab will a list of the errors will open with a list of all the errors the scan found. The top section shows all the links that the scan could not connect to separating them by type of error such as Not Found and Connection Error. A color coded system makes it easier to see what type of error they were. Next to each error is an X for you to delete the link if you want to. A button at top each section gives you a single click option to delete multiple links such as All Not Found (404) links, All Empty Folders and even All Duplicate Links.

 Those errors in yellow should be reviewed with caution because, as I stated above, these may simply be connection problems due to the network and not the website.

Although the duplicate section has a Delete All Duplicates button I would suggesting reviewing these manually as sometimes you may have duplicate links in different folders for personal reason and you may want to make sure the extension doesn't delete both links by accident.

One extra feature is the Scheduled Scan preferences that allow you to set the days the extension can auto scan and what to scan for such as bad links, duplicate links or both. You can also set how long to test a page before determining a error status thus allowing for more accurate scan. There is even the added bonus of choosing to support the extension developer by choosing to hide ads or not.


@@@@@@@@@@@@@@@@@@@@@@@@@@@@@@@@@@@@@@@@@@@
Thanks for reading. Please feel free to leave a comment below about your thoughts on this. +1 it if you liked it. Share it if you’re inclined. Much appreciated.  :+D
Chatterbox Chuck
Saturday, June 22, 2013

Start Browsing The Right Way With An Awesome New Tab Page


Enhancing Your Internet Experience

Chrome is an amazing browser but even as amazing as it is it can still be boring and too simplistic on its own. Especially the new tab page which can either be left to the default settings displaying your Chrome apps and website shortcuts or you can change it to open a specific page of your choice such as Google.com but while having a specific page like Google.com open in a new tab is OK and the standard Chrome new tab page is also OK, sometimes OK is just not good enough and so the next step is to go awesome.

Awesome New Tab Page  http://goo.gl/AQCKC

If awesome is your goal then look no further than to the Awesome New Tab Page extension. With this extension you can make all kinds of changes to your new tab page to configure it to your liking.

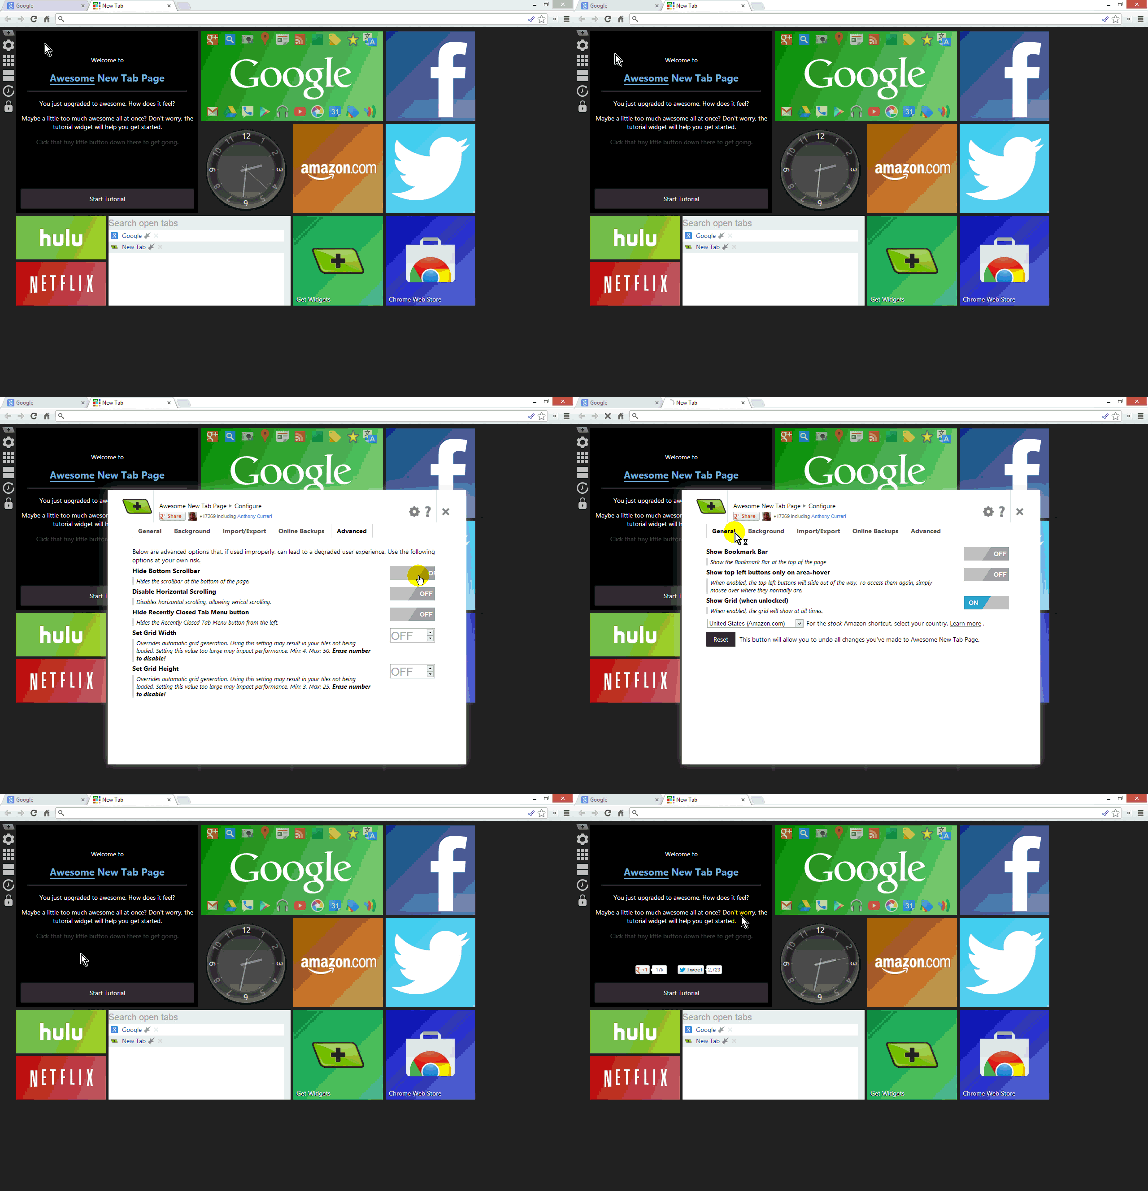
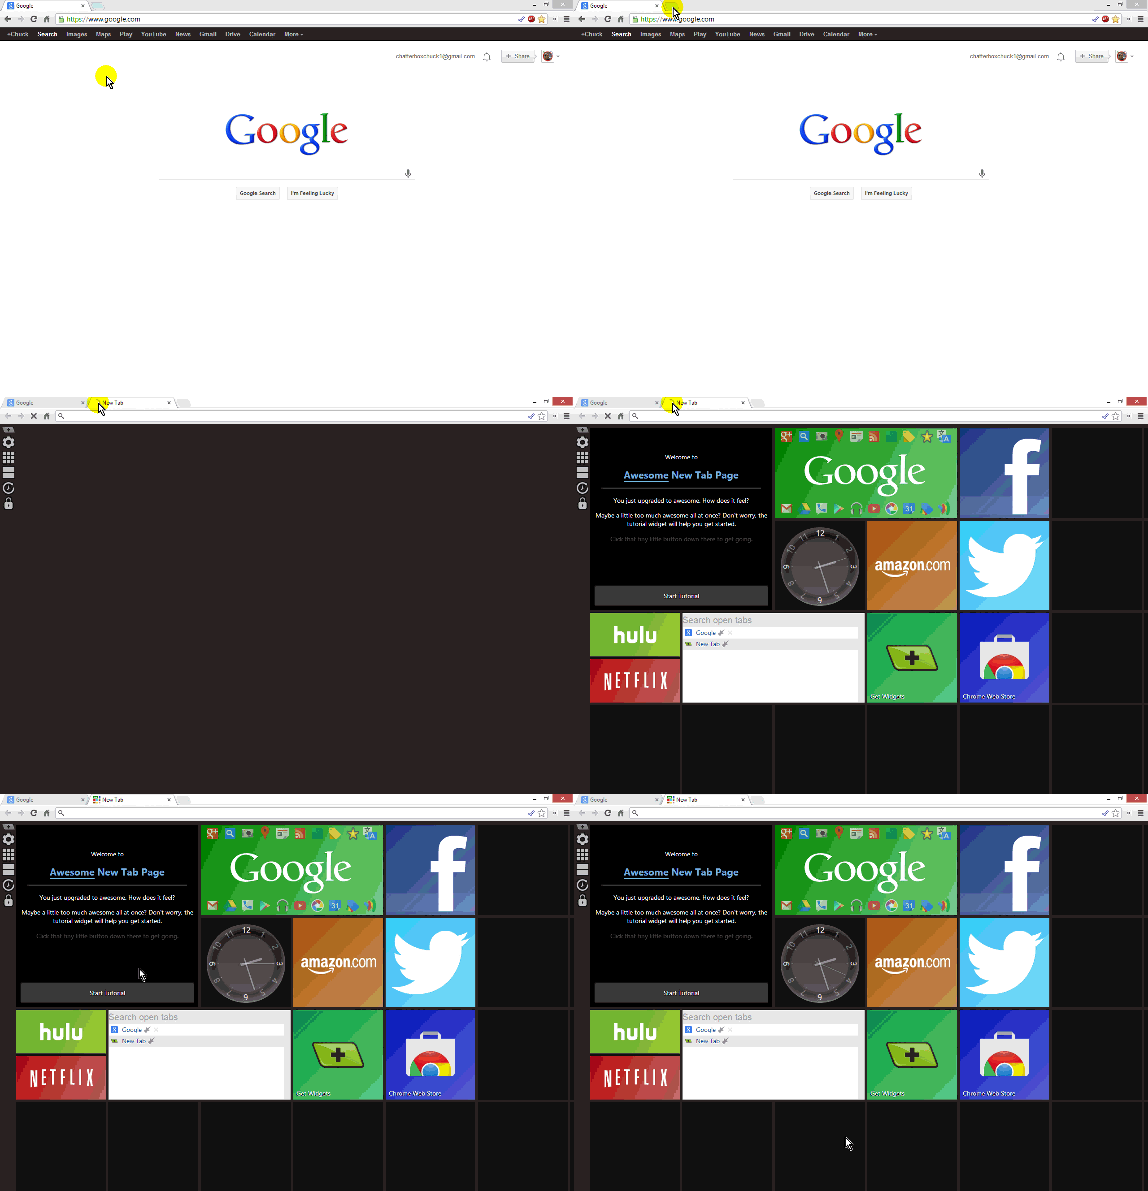
The default page starts out with a tutorial tile on how to use the extension, basic shortcuts tiles to common sites like Facebook, Twitter and Amazon, widgets tiles like a clock and open tabs list, a shortcut tile to the Chrome web store and to more awesome widgets and then there’s the Google tile which contains shortcuts to several of Google’s products making it easy to access any of them right from the new tab page. The only downside is that this tile cannot be configured separately to add or remove any of the Google products but its not a big deal so long as the extension developer keeps it updated with new products and eliminates those that have been retired.


To the left of the page you’ll see the toolbar with several options. The top icon is the about menu for the Awesome New Tab Page extension. Under that is the configure settings for the extension. Here you can reset the extension to its original default settings, display the bookmark bar on the new tab page and hide the menu icons. Want to add a cool background to your new tab page? You can do that here too. You can also import and export your Awesome New Tab Page settings and also save them in the cloud in case you want to have the same setting all across all your Chrome browsers.  This section has many more options if you just click around the tabs to adjust the new tab page to your liking.


If the default new tab is too boring or lacking then change it. By clicking on the lock icon to the left you’re given access to configure the entire page. You may notice when hovering over the tiles that editing icons appear allowing you to change the tiles configuration by clicking the pencil icon (if it has any) or delete it with the X icon. You can rearrange the tiles to your licking to make it look the way you want, making easy for you to find the tiles you like using.


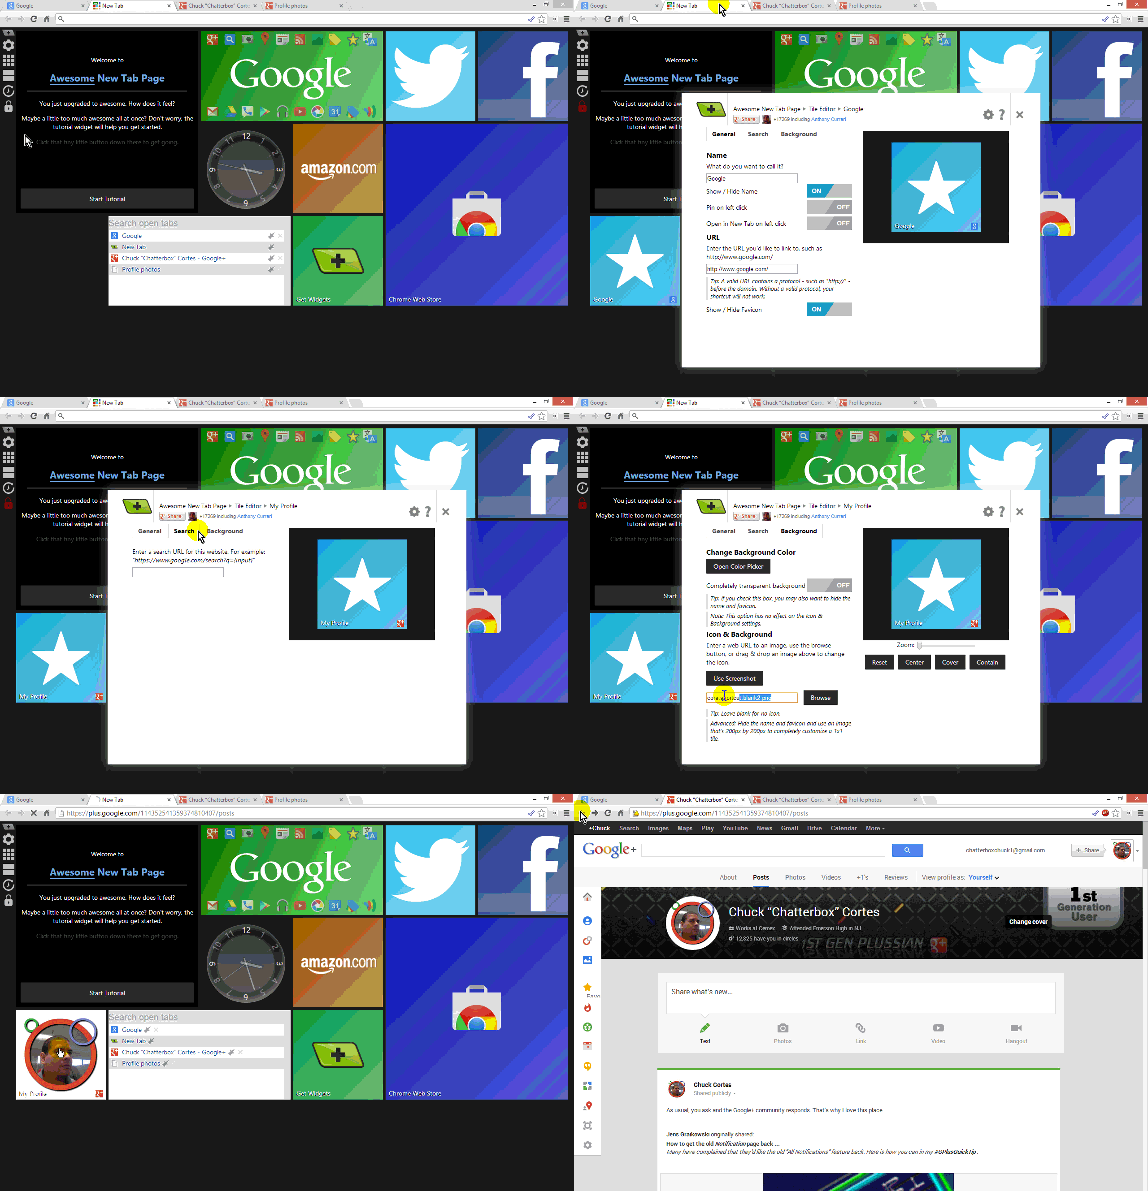
You can also move tiles to different slots to organize the tiles to your liking. You simply need to drag the tile to the slot you want. This dragging feature adds these diamond icons that you can drag to chance the size of the tiles as well. This feature is good if you have a particular site or app that you use often and want quick access to, like a link to your social media site profile, with a huge tile it makes it easy to find and quick to click.


Another great feature of this extension is the ability to create your own shortcut tiles. With the new tab page unlocked simply click on an empty tile slot and a new tile will be added and the configuration menu comes up allowing you to add the link to what you wish to open, an icon for the tile and more. You can configure the shortcut tile as you see fit.


Apart from shortcut tiles to websites you can also add app tiles for your favorite Chrome apps like Google Keep, Google Music, Gmail and even Pixlr Editor by clicking the apps on the side bar and dragging the apps from the menu while the page is unlocked. Some are cloud apps and others are apps that run on your desktop right from Chrome. Kinda like those on Chrome OS. Simply search for apps on the Chrome Web Store http://goo.gl/9G30I, install them to Chrome and add them to your Awesome New Tab Page for easy access.


Ah, lets not forget the widgets which is also on the side bar, these are tiles that work right from the new tab page like the clock, tab manager and even a notepad you write on and keep notes. Like the apps tile you simply drag the widgets from the widget menu and put them on any open slot you want while the page is unlocked. From the widget menu you can go to the widget page to download more widgets for your new tab page with all kinds of functions like a weather widget, a calculator widget, a Gmail widget and even a calendar widget. All easily available thru the Chrome Web Store.


Here is what my current set up looks like. I used the Meta-Tile widget http://goo.gl/tK7IU to add multiple links in a single tile to maximize space for more shortcut tiles. The background is the awesome (pun intended again) new 2014 Chevy Camaro because why not? A good reason to go back to the new tab page. One last trick I learned while writing this article was the backup feature. It comes in handy when you wanna add this extension to multiple Chrome browsers on different PCs since the settings don't sync with Chrome's sync feature. You simply go to the configure menu under the Import/Export tab and click on export. Below will show a backup code in a text box that you can copy and store. I chose to save mine into my Google Drive. When you have to restore the Awesome New Tab page to your preferred settings simply go back to the configure menu under the Import/Expert tab, click import, copy the code from your Awesome New Tab backup and paste it in the text box and hit apply and voila the Awesome New Tab page is restored to your preferred settings.


The Awesome New Tab Page extension is chock full of features that will allow you to create an Awesome New Tab page (pun intended) thus replacing the old, boring Chrome default new tab page. By adding more widgets and apps you can make your tab even better.


If you need help using this extension please feel free to ask me, I’d be glad to help.

@@@@@@@@@@@@@@@@@@@@@@@@@@@@@@@@@@@@@@@@@@@

Thanks for reading. Please feel free to leave a comment below about your thoughts on this. +1 it if you liked it. Share it if you’re inclined. Much appreciated.  :+D

Chatterbox Chuck
Thursday, June 20, 2013

Chrome’s Extensions Are A Plenty, Extension Manager Can Help


Enhancing Your Internet Experience

In this series I will be introducing you to all kinds of extensions that will make your Internet browsing experience even better than with just a basic browser. But considering the number of extensions that the Chrome Web Store has that you may consider using and the fact that the more extensions you have installed the more memory the browser will use, I figured I would start off this series with the one extension no Chrome browser extension user should be without.

Extensions Manager (aka Switcher) http://goo.gl/MQ8Un

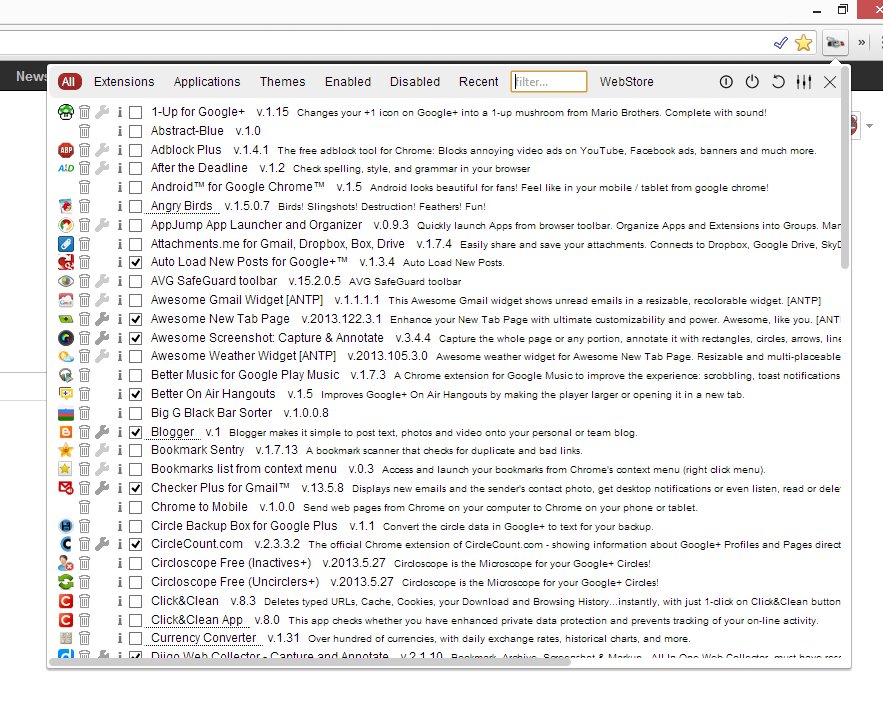
This extension is a must. With features galore, Extension Manager will help you take control of all your extensions giving you quick access to all of them right from the browser icon. Simply click the switch icon to get the dropdown menu where you can see all of you options. From this menu you can see all of your extensions, apps and even themes for your browser. You can filter them by enabled, disabled, themes and apps. Next to each extension there is a box that you can check to enable the extension and uncheck to disable. If the extension has options you’ll see a wrench icon you can click to access them.

You can also delete extensions, apps and themes from this menu with the trashcan icon and if you click on the extension’s icon it will take you to the Chrome Web Store page for this extension. A great way to get to the page if you would like to leave a comment to the developer, rate the extension and even see if details on the extension including the latest updates.

Looking for a particular extension among all those installed? Use the built in search box. You can even access the Chrome Web Store from the link next to the search box. The settings can be accessed from here as well if you want to tweak this extension.

All in all this is a great extension that will help you manage all the new extension I will be sharing with you throughout this series and believe me, there will be plenty. Simply use the check boxes next to each extension to turn on and off extensions and apps you only use on occasions, to switch themes and to turn off any extension that may be giving you problems. Definitely the one extension every Chrome user should have.


@@@@@@@@@@@@@@@@@@@@@@@@@@@@@@@@@@@@@@@@@@@
Thanks for reading. Please feel free to leave a comment below about your thoughts on this. +1 it if you liked it. Share it if you’re inclined. Much appreciated.  :+D

Chatterbox Chuck